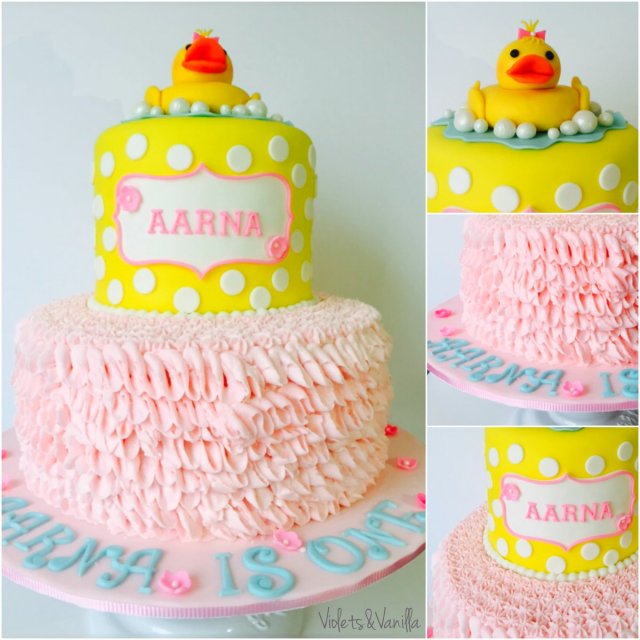
 Cake made for a sweet little girl’s first birthday. Yellow and white polka dots top tier covered in fondant, and the bottom tier covered in baby pink sweet buttercream ruffles to match the birthday girl’s gorgeous dress. Yellow ducky handmade out of fondant.
Category Archives: Uncategorized
Shaded red, orange and yellow Fall-themed Cake
 Hello helloo….did you all have a nice weekend? How was Thanksgiving? Tired after all that food and shopping? Did you score any awesome BlackFriday deals? So many questions, I know!
We had a very cozy, fun Thanksgiving dinner at my cousin’s house with family and friends, and I made this rustic Fall-themed cake as a birthday cake for my niece, who celebrated her 9th birthday the same day . The pumpkins were made out of orange and yellow fondant. Oh, how I loved that baby orange pumpkin…I so wanted to steal that cute little fella and sneak it back home, but by the time the cake was cut and devoured, it was no where to be seen. In someone’s tummy, I guess…😔
It was a simple vanilla cake filled with vanilla buttercream. I used this recipe from Smitten Kitchen. Just to give it a Fall feeling, I frosted the cake in shades of red, orange and yellow buttercream, and once you smooth everything out, you are left with this beautifully marbled, shaded effect. I was pretty happy with how it turned out. And hey, the rest of the desserts at the party…pumpkin cheesecake ( recipe coming soon), pistachio pudding, flan, and pecan pie…oh yum!
Sending this cake and my little pumpkins to Fiesta Friday at The Novice Gardener.
Craftsy Black Friday Sale– All classes $19.99 or less!
(Sponsored post)
One of the questions I get asked frequently is if there are any good cake decorating classes online. My answer is always Youtube videos and Craftsy classes. They have a wide range of topics on cake decorating from buttercream to fondant to more advanced sugar flowers and techniques taught by experienced cake decorators. And for all you guys who have been wanting to try the classes, I just wanted to give you a heads up that today through Monday (Dec 1), they are having a Black Friday sale and All Classes $19.99 or less! I think that’s an awesome deal, considering that some of these classes normally cost anywhere from $24.99 to $49.99.
Here’s wishing everyone a very happy Thanksgiving!
Introducing ‘new’ bloggers #21
Thank you so much Jhuls and Sarah for the mention….you guys are so kind!
Yay! I couldn’t believe I am already in #21 in the Introducing new bloggers series. Introduced 100 bloggers already? Wow. I feel so proud. 😀 But I admit that I had help from some of the amazing blogging buddies (you know who you are) and this time, Sarah, is doing it again.
Five out of seven already made it to last week’s episode. And now, Sarah will bring you the remaining bloggers she has emailed me:
 My Adventures in Dinnertime – Meet Amanda! She’s a mom of 2 and a loving wife. She makes amazing things! Take a look at this Chicken Caprese or these beautiful Vanilla Cupcakes. I expect great future posts from her 🙂
Belle of the Kitchen – Aah, meet Belle! When you visit her blog, you’re instant happy! Her blog is colorful and just full of joy!
Her about page starts really good:
View original post 520 more words
Flashback Friday…One of my favorite cakes.
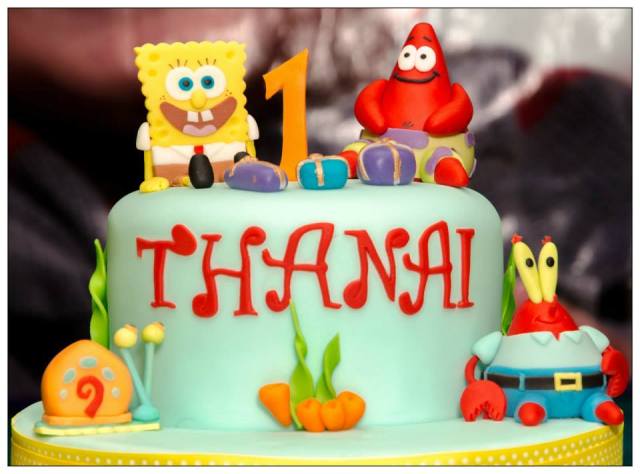
This is one cake that has given me a lot of satisfaction as a cake decorator. It was made for a dear friend’s son’s first birthday. When my friend told me she wanted a SpongeBob themed cake, I was a little concerned. I did not know anything about this cartoon. My little monkey is a picky cartoon-watcher ( well…I kinda made up that word…sorry), and wouldn’t watch anything other than his favorite Mickey, Little Einsteins and Octonauts. So, to make myself familiar with the characters, I started watching SpongeBob… 🙂 and much to my surprise, I found myself enjoying the show… 🙂 And after a week, I was ready to go.
All the characters were handcrafted out of gumpaste. In the end, I was pretty happy with how my SpongeBob, Patrick, Mr.Krabs, and Gary turned out. See, I know each one of them now…. :-). The people at the party actually mistook them for real toys. The birthday boy couldn’t care less, but his parents were ecstatic….and the final result?..my little monkey learned to say PONGE POP!!… :-).
Hope you guys like it as much I do. Sending this to Fiesta Friday at The Novice Gardener.
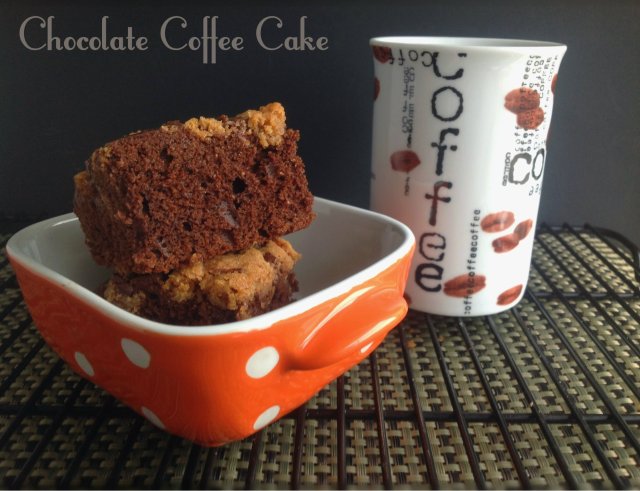
Chocolate Coffee Cake
Join me for breakfast, anyone? Or brunch, maybe? And then let’s gossip over some coffee. I’ll bring the cake, a chocolate cake, and a really good one at that. Soft and fluffy with a buttery cinnamon-brown sugar streusel on top. Interested yet? 🙂
To avoid any confusion, let me clarify; this cake does not contain any coffee, but is supposed to be eaten alongside a good cuppa coffee or tea, whenever you crave one, be it for breakfast, brunch, as a snack during your coffee break, or even as a simple dessert. Coffee cakes usually have a crumbly streusel topping or a simple glaze on top. These single layered cakes are often flavored with cinnamon, fruits, and nuts.
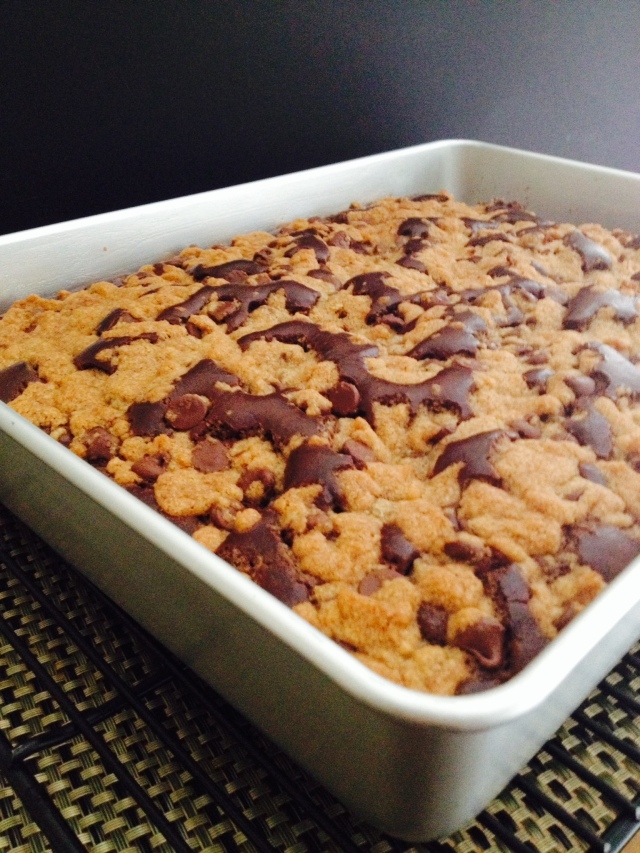
This recipe is perfect for a crowd since it yields a big quarter-sheet-sized cake and is rustic and pretty on its own, no frosting or decorating required, thanks to the cinnamon streusel on top. You can use either semisweet or bittersweet chocolate chips for the streusel. According to the recipe source, this coffee cake stores well after it is baked and completely cooled. It can be stored in a freezer bag (or tightly wrapped in plastic wrap and foil) and frozen for up to 2 months. Just defrost and reheat when needed.
Chocolate Coffee Cake
Recipe courtesy: Williams Sonoma
Ingredients:
Streusel:
2/3 cup all-purpose flour
1/2 cup firmly packed light brown sugar
1/2 tsp ground cinnamon
6 tbsp. cold unsalted butter, cut into small pieces
3/4 cup chocolate chips
Cake:
11/2 cups all-purpose flour
1/2 cup cake flour
2/3 cup unsweetened Dutch-process cocoa powder
1 tsp baking soda
1 tsp baking powder
1/2 tsp salt
1/2 cup unsalted butter
1 cup granulated sugar
3 large eggs
11/4 cups sour cream
11/2 tsp pure vanilla extract
Method:
Preheat the oven to 350 deg F. Grease and flour a 9-by-13-inch baking pan or dish. If using a glass baking dish, set the oven temperature to 325 deg F.
To make the streusel, in a small bowl, stir together the flour, brown sugar, and cinnamon, Using a pastry blender or your fingers, cut or rub in the butter until coarse crumbs form. Stir in the chocolate chips until evenly distributed.
To make the cake, in a bowl, stir together the all-purpose flour, cake flour, cocoa, baking soda, baking powder, and salt.
In another bowl, using an electric mixer on medium speed, cream together the butter and sugar until light and fluffy. Add the eggs, one at a time, beating thoroughly after each addition. Add the flour mixture in 2 or 3 additions, alternating with the sour cream and vanilla. Using the mixer on low speed, beat the batter until smooth and fluffy, about 2 mins.
Pour the batter into the prepared pan and spread it evenly. Sprinkle the streusel mixture evenly over the batter.
Bake until the topping is golden brown, 40-45 mins. A toothpick inserted into the center of the cake should come out clean. Transfer the pan to a wire rack to cool completely. Cut into squares to serve.
Tricolor Cardamom & Saffron Coconut Sorbet
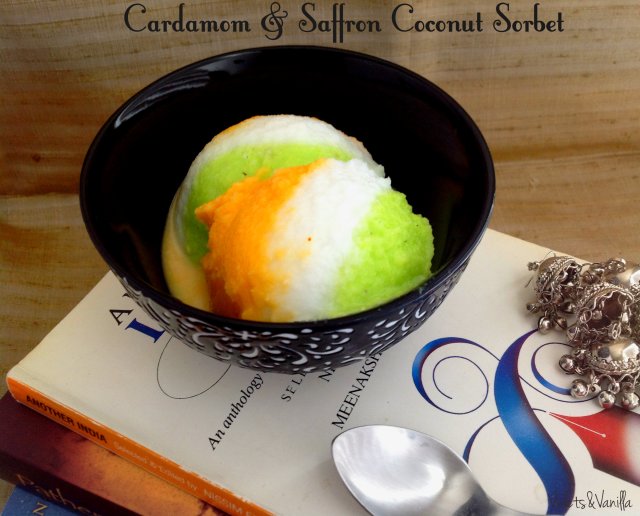
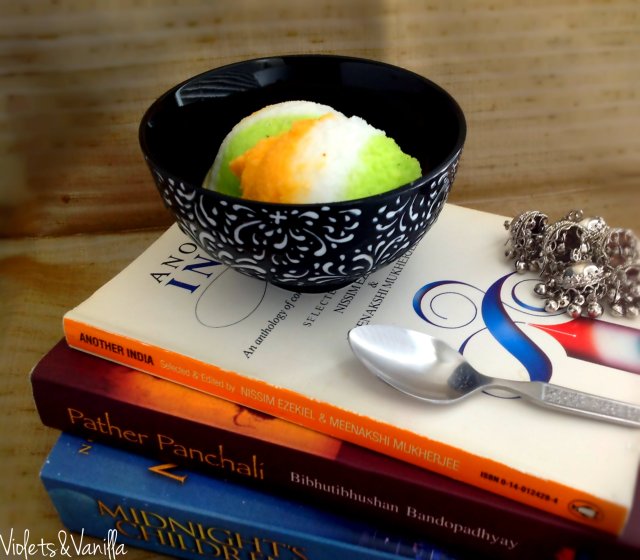
Happy Independence Day India!…Yes, India celebrates her 68th Independence Day today, August 15, 2014. And since no celebrations are complete without some sweet treats, here is my treat of the day — a tricolor sorbet. For everyone wondering what our Independence Day has got to do with tricolor, here’s the deal. In India, the term ‘Tricolor’ refers to the Indian flag, which is made up of three colors — saffron on top, white in the middle with the Ashoka Chakra ( Wheel of Law ) in the center, and green on the bottom. Saffron indicates strength and courage, white indicates peace and truth, while green shows the fertility, growth and auspiciousness of the land. And it was on this day in the year 1947 that the first Prime Minister of the Republic of India, Pandit Jawaharlal Nehru, hoisted for the first time, the Tricolor Flag of independent India.
August 15 is a national holiday in India and all proud Indians celebrate by hoisting the Tricolor, attending and taking part in the various parades, pageants and roadshows. Let me also take this moment to remember and salute all the brave men and women who sacrificed their lives for the freedom of their nation.
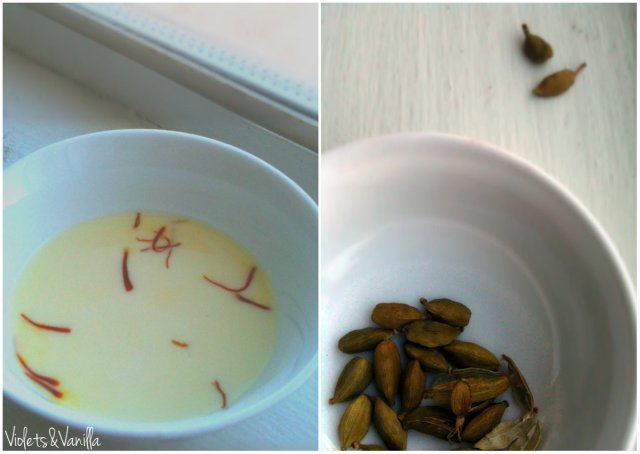
Now a bit about this sorbet. The base flavor of this sorbet is coconut. Food colors lend this sorbet the beautiful vibrant green and saffron hues. The green portion is further flavored by the addition of aromatic cardamom seeds and the saffron part, of course by saffron. I’ve added a bit of coconut extract to the white portion which is entirely optional. It is light, sweet and refreshing, and a breeze to prepare. It uses both grated coconut and coconut milk and also a squeeze of lime juice. Coconut, cardamom, and saffron, it couldn’t be more Indian than this, could it?
Sending this to the event at Cooking with SJ and Fiesta Friday #29 at The Novice Gardener.
Cardamom & Saffron Coconut Sorbet
Recipe adapted from 1000 Recipes by Rafi Fernandez, altered.
Ingredients:
3/4 cup superfine sugar
1/2 cup coconut milk
2/3 cup grated unsweetened coconut
a squeeze of lime juice
1/4 tsp coconut extract (optional)
Cardamom seeds from 4 pods, finely powdered
a pinch of saffron
2 tbsp. warm milk
Green and Orange food color
Method:
Mix saffron in the warm milk and keep aside.
Place the sugar in a heavy pan and add 3/4 cup water. Bring to a boil, stirring constantly, until the sugar has completely dissolved.
Reduce the heat and simmer for 5 mins to make a syrup.
Stir the coconut milk into the sugar syrup, along with most of the coconut and the lime juice. Pour the mixture into a bowl or freezer container and freeze for 2 hours.
Take the sorbet out of the freezer and blend it in a food processor until it is smooth and creamy. Divide the mixture into three bowls. Stir in the cardamom powder and the green color into one and mix well. Stir in the coconut extract into the next bowl and mix well. Stir in the saffron milk and orange color into the third bowl. Return to the freezer and leave until frozen. ( I froze them in cling wrap-lined mini loaf pans. Once frozen, I took them out and placed them inside another loaf pan, side by side along the length of the pan and placed it back in the freezer.
You could serve these as individual flavors or combine all the three frozen flavors together to form the tricolor sorbet.
Yaay!!
Guys, I’m beyond excited today!…Look who commented on my post Cashew Toffee Crunch Chocolate Torte…the creator of this fabulous dessert and the author of Small-Batch Baking for Chocolate Lovers, Debby Maugans herself. Yay! Isn’t that awesome? 🙂 Just wanted to share my excitement with you all.
Now let’s get back to our favorite thing…cooking, of course. See ya!.. 🙂


